The responseXML Property
Whereas the responseText property of the XMLHTTPRequest object contains a string, responseXML can be treated as if it were an XML document.
Caution
 | You need to make sure that your server presents valid and well-formed XML to be returned via the responseXML property. In situations where XML cannot be correctly parsed by the XMLHTTPRequest object, perhaps due to well-formedness errors or problems with unsupported character encoding, the content of the responseXML is unpredictable and also likely to be different in different browsers. |
Note
 | Like the responseText property, the value stored in responseXML is read-only, so you cannot write directly to this property; to manipulate it you must copy the value to another variable: var myobject = http.responseXML;
|
The complete structure and data contained in the XML document can now be made available by using JavaScript's DOM methods. Later in the lesson we'll demonstrate this with another working Ajax application, but first let's revisit the JavaScript DOM methods and introduce a few new ones.
More JavaScript DOM Methods
You met some of the JavaScript DOM methods, such as getElementById and getElementsByTagName, in previous lessons. In those cases, we were mostly concerned with reading the values of the nodes to write those values into HTML page elements.
This lesson looks at the DOM methods that can be used to actually create elements, thereby changing the structure of the page.
The Document Object Model can be thought of as a treelike structure of nodes. As well as reading the values associated with those nodes, you can create and modify the nodes themselves, thereby changing the structure and content of your document.
To add new elements to a page, you need to first create the elements and then attach them to the appropriate point in your DOM tree. Let's look at a simple example using the following HTML document:
<html>
<head>
<title>Test Document</title>
</head>
<body>
We want to place some text here:<br />
<div id="displaydiv></div>
</body>
</html>
In this example, we want to add the text "Hello World!" to the <div> container in the document body. We'll put our JavaScript routine into a function that we'll call from the body's onLoad() event handler.
First, we'll use the JavaScript DOM method createTextNode() to, well, create a text node:
var textnode = createTextNode('Hello World!');
We now need to attach textnode to the DOM tree of the document at the appropriate point.
You first learned about child nodes in Lesson 4, "Client-Side Coding Using JavaScript"; hopefully, you recall that nodes in a document are said to have children if they contain other document elements. JavaScript has an appendChild() method, which allows us to attach our new text node to the DOM tree by making it a child node of an existing document node.
In this case, we want our text to be inside the <div> container having the id displaydiv:
var textnode = document.createTextNode('Hello World!);
document.getElementById('displaydiv').appendChild(textnode);
Note
| Compare this DOM-based method of writing content to the page with the innerHTML method used in the project in Lesson 11. |
Let's look at the complete source of the page, after wrapping up this JavaScript code into a function and adding the onLoad() event handler to execute it:
<html>
<head>
<title>Test Document</title>
<script Language="JavaScript">
function hello()
{
var textnode = document.createTextNode('Hello World!');
document.getElementById('displaydiv').appendChild(textnode);
}
</script>
</head>
<body onLoad="hello()">
We want to place some text here:<br />
<div id="displaydiv"></div>
</body>
</html>
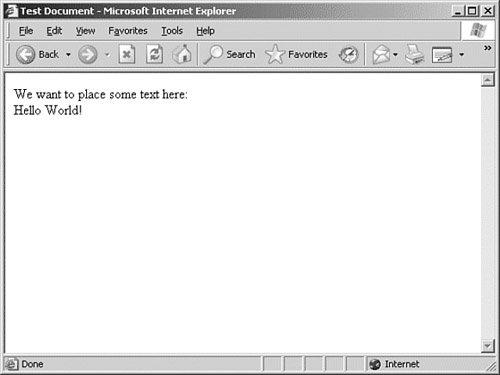
Figure 14.1 shows the browser display after loading this page.
Figure 14.1. The DOM says "Hello World!"
[View full size image]
Note
| If you display the source code of this document in your browser, you won't see the 'Hello World!' text inside the <div> container. The browser builds its DOM representation of the HTML document and then uses that model to display the page. The amendments made by your code are made to the DOM, not to the document itself. |
When you want to create other page elements besides text nodes, you can do so using the createElement() method, which works pretty much like createTextNode(). We could, in fact, have used createElement() to create the <div> container itself, prior to adding our 'Hello World!' text node:
var newdiv = document.createElement("div");
In general, you simply pass the type of the required page element as an argument to createElement() to generate the required type of element.
An Overview of DOM Methods
This book is about Ajax, not just about JavaScript DOM techniques, so we're not going to reproduce here a comprehensive guide to all the available methods and properties. However, Table 14.1 itemizes some of the more useful ones.
Table 14.1. Some JavaScript DOM Properties and Methods
Node Properties | |
|---|
childNodes | Array of child nodes |
firstChild | The first Child node |
lastChild | The last Child node |
nodeName | Name of the node |
nodeType | Type of node |
nodeValue | Value contained in the node |
nextSibling | Next node sharing the same parent |
previousSibling | Previous node sharing same parent |
parentNode | Parent of this node |
Node Methods | |
|---|
AppendChild | Add a new child node |
HasChildNodes | True if this node has children |
RemoveChild | Deletes a child node |
Document Methods | |
|---|
CreateAttribute | Make a new attribute for an element |
CreateElement | Make a new document element |
CreateTextNode | Make a text item |
GetElementsByTagName | Create an array of tagnames |
GetElementsById | Find an element by its ID |
Tip
 | If you need a more comprehensive account of the JavaScript DOM methods and properties, Andrew Watt gives a useful list in his excellent book Sams Teach Yourself XML in 10 Minutes (Sams Publishing, ISBN 0672324717). |
![[View full size image]](14fig01_alt.jpg)