Figure 7. Simple client-server design
Most of you have heard it before. In the matrix, take the blue pill, and you can continue to live in blissful ignorance. Take the red pill, and your eyes are open to reality. Sometimes, reality hurts.
We have a whole industry slamming blue pills like a preacher’s kid in Amsterdam. Concurrency is hard, so we punt. We add mutable state, so our programs collide when we run them concurrently. Our functions and methods have side effects, so we can’t prove correctness or predict their outcomes. We use threads with shared state rather than shared-nothing processes for performance, so we have to do extra work to protect each piece of code.
The result is chaos. Concurrency hurts, not because it is inherently difficult but because we’ve been using the wrong programming model!
Earlier in the chapter, I said Erlang made some easy things hard. Without side effects and mutable state, you’ll have to change the way you approach coding altogether. You’ll have to put up with a Prolog-based syntax that seems alien to many. But now, you’ll get the payoff. That red pill, concurrency and reliability, will seem like candy to you. Let’s find out how.
Your three basic primitives for concurrency will be sending a message (using !), spawning a process (with spawn), and receiving a message (with receive). In this section, I’ll show you how to use these three primitives to send and receive a message and to wrap them in a basic client-server idiom.
We’ll start with a translation process. If you send the process a string in Spanish, it will reply with an English translation. In general, your strategy will be to spawn a process that receives and processes the message in a loop.
Here’s what a basic receive loop looks like:
| erlang/translate.erl | |
-module(translate).
|
|
-export([loop/0]).
|
|
loop() ->
|
|
receive
|
|
"casa" ->
|
|
io:format("house~n"),
|
|
loop();
|
|
|
|
"blanca" ->
|
|
io:format("white~n"),
|
|
loop();
|
|
|
|
_ ->
|
|
io:format("I don't understand.~n"),
|
|
loop()
|
|
end.
|
|
That’s longer than our other examples so far, so we’ll break it down. The first two lines just define the module called translate and export the function called loop. The next block of code is the function called loop():
loop() ->
|
|
...
|
|
end.
|
Notice that the code inside calls loop() three times, without any returns. That’s OK: Erlang is optimized for tail recursion, so there’s very little overhead, as long as the last thing in any receive clause is a loop(). We’re basically defining an empty function and looping forever. Moving on to the receive:
receive ->
|
|
...
|
This function will receive a message from another process. receive works like the other pattern matching constructs in Erlang, the case and the function definitions. You’ll follow receive with several pattern matching constructs. Moving on to the individual matches:
"casa" ->
|
|
io:format("house~n"),
|
|
loop();
|
This is a matching clause. The syntax is nicely consistent with case statements. If the inbound message matches the string "casa", Erlang will execute the following code. Separate lines are delimited with a , character, and you’ll terminate the clause with a ; character. This code displays the word house and then calls loop. (Remember, there’s no overhead on the stack, because loop is the last function called.) All of the other matching clauses look the same.
Now, we have a module with a receive loop in it. It’s time to put it to use.
First, we compile this module:
1> c(translate).
|
|
{ok,translate}
|
To spawn a process, you’ll use the function spawn, which takes a function. That function will be started in a new lightweight process. spawn returns a process ID (PID). We’ll pass in the function from our translate module, like this:
2> Pid = spawn(fun translate:loop/0).
|
|
<0.38.0>
|
You can see that Erlang returned the process ID of <0.38.0>. In the console, you’ll see process IDs enclosed in angle brackets. We’re going to cover only the primitive version of process spawning, but you should know about a few others too. You can register processes by name, so other processes can find, say, common services by name rather than process ID. You can also use another version of spawn for code that you want to be able to change on the fly, or hot-swap. If you were spawning a remote process, you would use spawn(Node, function) instead. These topics are beyond the scope of this book.
So now, we’ve coded a module with a code block, and we’ve spawned it as a lightweight process. The last step is to pass messages to it. That is the third Erlang primitive.
As you saw in Scala, you will pass distributed messages to Erlang with the ! operator. The form is Pid ! message. The Pid is any process identifier. message can be any value, including primitives, lists, or tuples. Let’s send a few messages:
3> Pid ! "casa".
|
|
"house"
|
|
"casa"
|
|
4> Pid ! "blanca".
|
|
"white"
|
|
"blanca"
|
|
5> Pid ! "loco".
|
|
"I don't understand."
|
|
"loco"
|
Each line sends a message. The io:format in our receive clauses prints a message, and then the console prints the return value of the expression, which is the message you sent.
If you were sending a distributed message to a named resource, you’d use the syntax node@server ! message instead. Setting up a remote server is beyond the scope of this book, but with very little self-study, you can easily get a distributed server going.
This example illustrates the basic primitives and how you’d weave them together to form a basic asynchronous service. You may have noticed that there is no return value. In the next section, we’ll explore how to send synchronous messages.
Some concurrent systems work asynchronously, like phone chats. The sender transmits a message and goes on, without waiting for a response. Others work synchronously, like the Web. We ask for a page, and the web server sends it while we wait for the response. Let’s turn the translation service that prints return values into a service that actually returns the translated string to the user.
To change our messaging model from asynchronous to synchronous, we’ll have a three-part strategy:
Each receive clause in our messaging service will need to match a tuple having the ID of the process requesting the translation and the word to translate. Adding this ID will allow us to send a response.
Each receive clause will need to send a response to the sender instead of printing the result.
Instead of using the simple ! primitive, we’ll write a simple function to send the request and await the response.
Now that you know the background, take a look at the pieces of the implementation.
The first order of business is to modify our receive clauses to take additional parameters. That means we’re going to have to use tuples. Pattern matching makes it easy. Each receive clause looks like this:
receive
|
|
{Pid, "casa"} ->
|
|
Pid ! "house",
|
|
loop();
|
|
...
|
We match any element (this should always be a process ID), followed by the word casa. We then send the word house to the receiver and loop back to the top.
Note the pattern match. This is a common form for a receive, where the ID of the sending process is the first element of a tuple. Otherwise, the only major difference is sending the result rather than printing it. Sending a message gets a little more complicated, though.
The other side of the equation needs to send a message and then immediately wait for a response. Given a process ID in Receiver, sending a synchronous message will look something like this:
Receiver ! "message_to_translate",
|
|
receive
|
|
Message -> do_something_with(Message)
|
|
end
|
Since we’ll be sending messages so often, we’ll simplify the service by encapsulating a request to the server. In our case, that simple remote procedure call looks like this:
translate(To, Word) ->
|
|
To ! {self(), Word},
|
|
receive
|
|
Translation -> Translation
|
|
end.
|
When you put it all together, you get a concurrent program that’s only marginally more complicated.
| erlang/translate_service.erl | |
-module(translate_service).
|
|
-export([loop/0, translate/2]).
|
|
loop() ->
|
|
|
|
receive
|
|
{From, "casa"} ->
|
|
From ! "house",
|
|
loop();
|
|
|
|
|
|
{From, "blanca"} ->
|
|
From ! "white",
|
|
loop();
|
|
|
|
{From, _} ->
|
|
From ! "I don't understand.",
|
|
loop()
|
|
end.
|
|
|
|
translate(To, Word) ->
|
|
To ! {self(), Word},
|
|
receive
|
|
Translation -> Translation
|
|
end.
|
|
The usage model looks like this:
1> c(translate_service).
|
|
{ok,translate_service}
|
|
2> Translator = spawn(fun translate_service:loop/0).
|
|
<0.38.0>
|
|
3> translate_service:translate(Translator, "blanca").
|
|
"white"
|
|
4> translate_service:translate(Translator, "casa").
|
|
"house"
|
We simply compile the code, spawn the loop, and then request a synchronous service through the helper function we wrote. As you can see, the Translator process now returns the translated value for the word. And now, you have a synchronous message.
|
|
|
Figure 7. Simple client-server design |
Now, you can see the structure of a basic receive loop. Each process has a mailbox. The receive construct just picks messages off the queue and matches them to some function to execute. Processes communicate between one another with message passing. It’s no accident that Dr. Armstrong calls Erlang a true object-oriented language! It gives you message passing and encapsulation of behavior. We’re just losing mutable state and inheritance, though it’s possible to simulate inheritance, and more, through higher-order functions.
So far, we’ve worked in basic, sterile conditions with no error recovery capability. Erlang does provide checked exceptions, but I want to walk you through another way of handling errors instead.
In this section, we’re going to look at ways to link processes for better reliability. In Erlang, you can link two processes together. Whenever a process dies, it sends an exit signal to its linked twin. A process can then receive that signal and react accordingly.
To see how linking processes works, let’s first create a process that can easily die. I’ve created a Russian roulette game. It has a gun with six chambers. To fire a chamber, you just send a number 1--6 to the gun process. Enter the wrong number, and the process kills itself. Here’s the code:
| erlang/roulette.erl | |
-module(roulette).
|
|
-export([loop/0]).
|
|
|
|
% send a number, 1-6
|
|
loop() ->
|
|
receive
|
|
3 -> io:format("bang.~n"), exit({roulette,die,at,erlang:time()});
|
|
_ -> io:format("click~n"), loop()
|
|
end.
|
|
The implementation is pretty easy. We have a message loop. Matching 3 executes the code io:format("bang~n"), exit({roulette,die,at,erlang:time()};, killing the process. Anything else just prints a message and goes back to the top of the loop.
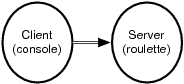
We really have a simple client-server program. The client is the console, and the server is the roulette process, as shown in Figure 7, Simple client-server design.
And here’s what the execution looks like:
1> c(roulette).
|
|
{ok,roulette}
|
|
2> Gun = spawn(fun roulette:loop/0).
|
|
<0.38.0>
|
|
|
|
3> Gun ! 1.
|
|
"click"
|
|
1
|
|
4> Gun ! 3.
|
|
"bang"
|
|
3
|
|
5> Gun ! 4.
|
|
4
|
|
6> Gun ! 1.
|
|
1
|
The problem is that after a 3, the gun process is dead, and further messages do nothing. We can actually tell whether the process is alive:
7> erlang:is_process_alive(Gun).
|
|
false
|
The process is definitely dead. It’s time to get on the cart. We can do a little bit better. Let’s build a monitor that will tell us whether the process dies. I guess that’s more of a coroner than a monitor. We’re only interested in death.
Here’s what the code looks like:
| erlang/coroner.erl | |
-module(coroner).
|
|
-export([loop/0]).
|
|
|
|
loop() ->
|
|
process_flag(trap_exit, true),
|
|
receive
|
|
{monitor, Process} ->
|
|
link(Process),
|
|
io:format("Monitoring process.~n"),
|
|
loop();
|
|
|
|
{'EXIT', From, Reason} ->
|
|
io:format("The shooter ~p died with reason ~p.", [From, Reason]),
|
|
io:format("Start another one.~n"),
|
|
loop()
|
|
end.
|
|
As usual, we’re building a receive loop. Before we do anything else, the program must register the process as one that will trap exits. You won’t receive EXIT messages without it.
Then, we process a receive. The receive gets two types of tuples: those beginning with the atom monitor and those beginning with the string ’EXIT’. Let’s look at each in more detail.
{monitor, Process} ->
|
|
link(Process),
|
|
io:format("Monitoring process.~n"),
|
|
loop();
|
This code links the coroner process to any process with a PID of Process. You can also spawn a process with the links already in place with spawn_link. Now, if the monitored process should die, it will send an exit message to this coroner. Moving on to trapping the error:
{'EXIT', From, Reason} ->
|
|
io:format("The shooter died. Start another one.~n"),
|
|
loop()
|
|
end.
|
This is the code that matches the exit message. It will be a three-tuple with ’EXIT’, followed by the PID from the dying process as From and the reason for failure. We print the PID of the dying process and the reason. Here’s the overall flow:
1> c(roulette).
|
|
{ok,roulette}
|
|
2> c(coroner).
|
|
{ok,coroner}
|
|
3> Revolver=spawn(fun roulette:loop/0).
|
|
<0.43.0>
|
|
4> Coroner=spawn(fun coroner:loop/0).
|
|
<0.45.0>
|
|
5> Coroner ! {monitor, Revolver}.
|
|
Monitoring process.
|
|
{monitor,<0.43.0>}
|
|
6> Revolver ! 1.
|
|
click
|
|
1
|
|
7> Revolver ! 3.
|
|
bang.
|
|
3
|
|
The shooter <0.43.0> died with reason
|
|
{roulette,die,at,{8,48,1}}. Start another one.
|
Now, we’re getting more sophisticated than client-server. We’ve added a monitor process, as in Figure 8, Adding monitoring, so we can tell when the process dies.

|
|
Figure 8. Adding monitoring |
We can do better. If we register the gun (gun pun intended), game players will no longer have to know the PID of the gun to play. Then, we can push the gun creation into the coroner. Finally, the coroner can restart the process whenever the process dies. And we’ve achieved much better reliability and without excessive error reporting. At this point, the coroner is not just a coroner. He’s a doctor, and one that’s capable of raising the dead. Here’s the new doctor:
| erlang/doctor.erl | |
-module(doctor).
|
|
-export([loop/0]).
|
|
loop() ->
|
|
process_flag(trap_exit, true),
|
|
receive
|
|
new ->
|
|
io:format("Creating and monitoring process.~n"),
|
|
register(revolver, spawn_link(fun roulette:loop/0)),
|
|
loop();
|
|
{'EXIT', From, Reason} ->
|
|
io:format("The shooter ~p died with reason ~p.", [From, Reason]),
|
|
io:format(" Restarting. ~n"),
|
|
self() ! new,
|
|
loop()
|
|
end.
|
|
The receive block now matches two messages: new and the same EXIT tuple. They are both a little different from the coroner predecessor. This is the magic line of code in the new block:
register(revolver, spawn_link(fun roulette:loop/0)),
|
Working from the inside out, we spawn a process with spawn_link. That version of spawn will link the processes so the doctor will get notified whenever a roulette process dies. We then register the PID, associating it with the revolver atom. Now, users can send messages to this process by using revolver ! message. We no longer need the PID. The EXIT match block is also smarter. Here’s the new line of code:
self() ! new,
|
We send a message to ourself, spawning and registering a new gun. The game is much easier to play, too:
2> c(doctor).
|
|
{ok,doctor}
|
|
3> Doc = spawn(fun doctor:loop/0).
|
|
<0.43.0>
|
|
4> revolver ! 1.
|
|
** exception error: bad argument
|
|
in operator !/2
|
|
called as revolver ! 1
|
As expected, we have not created the process yet, so we get an error. Now, we’ll create and register one:
5> Doc ! new.
|
|
Creating and monitoring process.
|
|
new
|
|
6> revolver ! 1.
|
|
click
|
|
1
|
|
7> revolver ! 3.
|
|
bang.
|
|
3
|
|
The shooter <0.47.0> died with reason {roulette,die,at,{8,53,40}}.
|
|
Restarting.
|
|
Creating and monitoring process.
|
|
8> revolver ! 4.
|
|
click
|
|
4
|
We now take the incongruous step of creating the revolver through the Doctor. We interact with the revolver by sending messages through the revolver atom instead of the Gun PID. You can also see after line 8 that we in fact create and register a new revolver. The overall topology is generally the same as it was in Figure 8, Adding monitoring, with the doctor playing a more active role than the coroner did.
We’ve just scratched the surface, but I hope that you can see how Erlang can make it easy to create much more robust concurrent systems. You don’t see much error handling here at all. When something crashes, we just start a new one. It’s relatively simple to build monitors that watch each other. In fact, the base libraries have plenty of tools to build monitoring services and keep-alives that Erlang restarts automatically upon any kind of failure.
In day 3, you started to get a pretty good feel for what you can do with Erlang. We started with the concurrency primitives: send, receive, and spawn. We built the natural asynchronous version of a translator to illustrate how basic message-passing works. Then, we built a simple helper function that encapsulated a send and a receive together to simulate a remote procedure call with a send and receive.
Next, we linked processes together to show how one process notifies another when it dies. We also learned to monitor one process with another for better reliability. Our system was not fault tolerant, though the ideas that we used could be used to build fault-tolerant systems. Erlang distributed communication works exactly like interprocess communication. We could link two processes, on separate computers, so that a standby monitored the master and took over in the event of a problem.
Let’s put some of what you’ve learned to work.
These exercises are relatively easy, but I did add some bonus questions to stretch you a little bit.
Open Telecom Platform (OTP) is a powerful package with much of what you’ll need to build a distributed, concurrent service.
Find:
An OTP service that will restart a process if it dies
Documentation for building a simple OTP server
Do:
Monitor the translate_service and restart it should it die.
Make the Doctor process restart itself if it should die.
Make a monitor for the Doctor monitor. If either monitor dies, restart it.
The following bonus questions will take a little bit of research to complete:
Create a basic OTP server that logs messages to a file.
Make the translate_service work across a network.