
Elements of an HTML Page
Let's look at Listing 2.1 in a little more detail.
The first element on the page is known as the DOCTYPE element. Its purpose is to notify the browser of the "flavor" of HTML used in the document. The DOCTYPE element used throughout this book refers to HTML 4.0 Transitional, a fairly forgiving version of the HTML specification that allows the use of some earlier markup styles and structures in addition to the latest HTML 4.0 specifications.
The DOCTYPE element must always occur right at the beginning of the HTML document.
Next, note that the remainder of the document is enclosed by the elements <html> at the start of the page and </html> at the end. These tags notify the browser that what lies between should be interpreted and displayed as an HTML document.
Caution
 | Although many modern browsers correctly display HTML without these tags, it is bad practice to omit them. Even if the page is shown correctly on your own PC, you have no idea what operating system and browser a visitor may be usinghe may not be so lucky. |
The document within these outer tags is split into two further sections. The first is enclosed in <head> and </head> tags, and the second is contained between <body> and </body>. Essentially, the document's head section is used to store information about the document that is not to be displayed in the browser window, whereas the body of the document contains text to be interpreted and displayed to the user via the browser window.
The <head> of the Document
From Listing 2.1 we can see that the head section of our simple HTML document contains only one linethe words A Simple HTML Document enclosed in <title> and </title> tags.
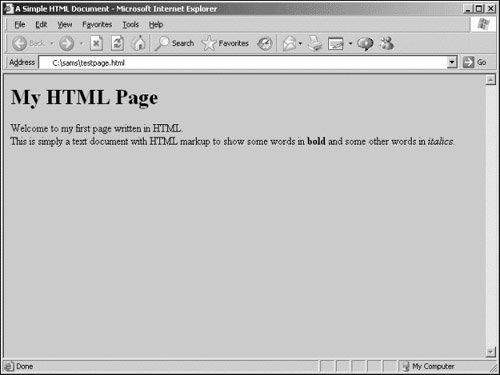
Remember that the head section contains information that is not to be displayed in the browser window. This is not, then, the title displayed at the top of our page text, as you can confirm by looking again at Figure 2.1. Neither does the document title refer to the filename of the document, which in this case is testpage.html.
In fact, the document title fulfils a number of functions, among them:
Search engines often use the page title (among other factors) to help them decide what a page is about.
When you bookmark a page, it is generally saved by default as the document title.
Most browsers, when minimized, display the title of the current document on their icon or taskbar button.
It's important, therefore, to choose a meaningful and descriptive title for each page that you create.
Many other element types are used in the head section of a document, including link, meta, and script elements. Although we don't give an account of them here, they are described throughout the book as they occur.
The Document <body>
Referring again to Listing 2.1, we can clearly see that the content of the document's body section is made up of the text we want to display on the page, plus some tags that help us to define how that text should look.
To define that certain words should appear in bold type, for example, we enclose those words in <b> and </b> tags. Similarly, to convert certain words into an italic typeface, we can use the <i> and </i> tags.
The heading, My HTML Page, is enclosed between <h1> and </h1> tags. These indicate that we intend the enclosed text to be a heading. HTML allows for six levels of headings, from h1 (the most prominent) to h6. You can use any of the intermediate values h2, H3, h4, and H5 to display pages having various levels of subtitles, for instance corresponding to chapter, section, and paragraph headings. Anything displayed within header tags is displayed on a line by itself.
All the tags discussed so far have been containersthat is, they consist of opening and closing tags between which you place the text that you want these tags to act upon. Some elements, however, are not containers but can be used alone. Listing 2.1 shows one such element: the <br /> tag, which signifies a line break. Another example is <hr /> (a horizontal line).
Tip
 | If you want to write in the body section of the HTML page but don't want it to be interpreted by the browser and therefore displayed on the screen, you may do so by writing it as a comment. HTML comments start with the character string <!-- and end with the string --> as in this example: <!-- this is just a comment and won't be displayed in the browser --> |
Adding Attributes to HTML Elements
Occasionally there is a need to specify exactly how a markup tag should behave. In such cases you can add (usually within the opening tag) parameter and value pairs, known as attributes, to change the behavior of the element:
<body bgcolor="#cccccc">
... page content goes here ...
</body>
In this example, the behavior of the <body> tag has been modified by adjusting its BGCOLOR (background color) property to a light gray. Figure 2.2 shows the effect this has if applied to our file testpage.html:
Figure 2.2. Our test page with the body color changed to gray.
Tip
| Color values in HTML are coded using a hexadecimal system. Each color value is made up from three component values, corresponding to red, green, and blue. Each of the color values can range from hex 00 to hex ff (zero to 255 in decimal notation). The three hex numbers are concatenated into a string prefixed with a hash character #. The color value #000000 therefore corresponds to black, and #ffffff to pure white. |
Images
Images can be inserted in our page by means of the <img /> tag. In this case we specify the source file of the image as a parameter by using the src attribute. Other aspects of the image display that we can alter this way include the borders, width, and height of the image:
<img src="myimagefile.jpg" border="2" width="250" height="175" />
Border width, image width, and image height are in numbers of pixels (the "dots" formed by individual picture elements on the screen).
Tip
| A further useful attribute for images is alt, which is an abbreviation of alternative text. This specifies a short description of the image that will be offered to users whose browsers cannot, or are configured not to, display images. Alternative text can also be important in making your website accessible to those with visual impairment and other disabilities: <img src="myimagefile.jpg" alt="Description of Image" /> |
Tables
Often you want to display information in tabular format, and HTML has a set of elements designed specifically for this purpose:
<table>
<tr><th>Column Header 1</th><th>Column Header 2</th></tr>
<tr><td>Data Cell 1</td><td>Data Cell 2</td></tr>
<tr><td>Data Cell 3</td><td>Data Cell 4</td></tr>
</table>
The <table> and </table> tags contain a nested hierarchy of other tags, including <tr> and </tr>, which define individual table rows; <th> and </th>, which indicate cells in the table's header; and <td> and </td>, which contain individual cells of table data.
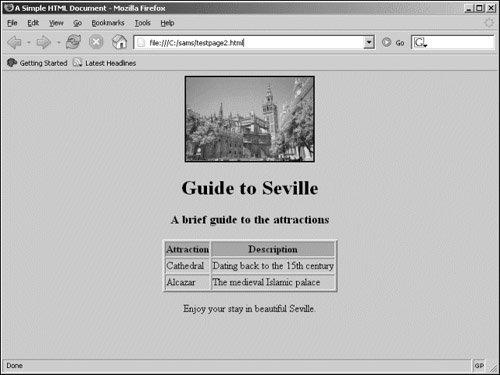
Look ahead to Figure 2.3 to see an example of how a table looks when displayed in a browser window.
Figure 2.3. seville.html shown in Mozilla Firefox.
Hyperlinks
Hypertext links (hyperlinks) are fundamental to the operation of HTML. By clicking on a hyperlink, you can navigate to a new location, be that to another point on the current page or to some point on a different page on another website entirely.
Links are contained within an <a>, or anchor tag, a container tag that encloses the content that will become the link. The destination of the link is passed to this tag as a parameter HRef:
Here is <a href="newpage.html">my hyperlink</a>
Clicking on the words my hyperlink in the above example results in the browser requesting the page newpage.html.
Tip
| A hyperlink can contain images as well as, or instead of, text. Look at this example: <a href="newpage.html"><img src="picfile.gif" /></a> Here, a user can click on the image picfile.gif to navigate to newpage.html. |
![[View full size image]](02fig02_alt.jpg)
![[View full size image]](02fig03_alt.jpg)